
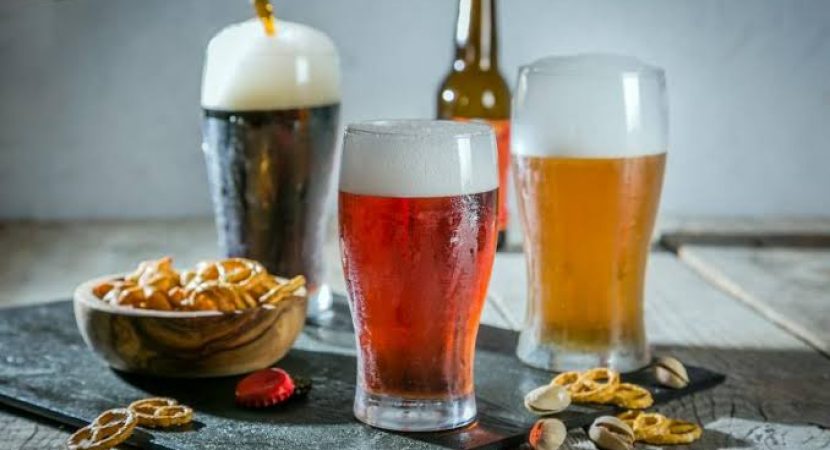

If you’ve never done this before, we’re going to show you the easy way to do it at home. The best way to brew your first batch of beer is to pick up an ingredient kit from your local homebrew supply store, most homebrew supply stores will carry what we might call a box kit that has all the ingredients you’ll need to brew your first batch of beer with instructions, so you’ll find mold extract in your kit.
Ingredients
That is a liquid malt extract, a bag of crushed specialty grains. You should have some hops, they might be vacuum-sealed in a foil pouch and you must have a package with muslin bags for steeping hops. A package of yeast is added for fermenting the beer, a warlock tablet to clarify the beer and the first step to making your own beer is to steep your specialty grains to add specific malt character to your batch of beer. You might use any range of specialty grains to get different characters in your beer, you might use a caramelized grain or even a roasted grain for dark flavors that you might find in a stout or a porter.
Here’s a quick rundown of the ingredients and equipment to use for Making Homebrew:
- Kettle
- Fermenter + Airlock
- Funnel
- Sanitizer
- Siphon
- Stir Spoon
- Hydrometer
- Bottle cleaning brush
- Crushed specialty grains
- liquid malt extract
- Muslin bags
- Yeast
Step-by-Step Homebrew Making Guide
-
Brewing
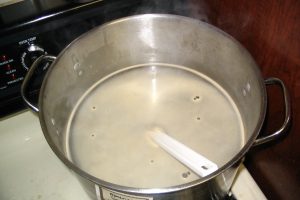
 The first thing to do is to steep the grains in hot water in a five-gallon kettle. A 5-gallon kettle is an ideal size to use and stainless pots which is less corrosive and easy to take care of than other metals and that would be an ideal material for the kettle that you’ll use. Check that your water is approximately 150 to 170 degrees using a simple stainless thermometer to check the temperature. Place the crushed specialty grains into a muslin bag and tie a knot into the top of the bag to hold them in. And when the water is at the correct temperature, steep them. If you have a flame on your pot, you’ll want to turn it off at this point so that your specialty grains when they sink to the bottom of the pot won’t scorch against that flame and the heat, you’ll also want to stir the grains periodically and you’ll see in a few moments how much color and flavors steep out of those greens once you’ve steeped your grains for approximately 30 minutes.
-
Fermenting
You’ll want to remove them from the water place them in a strainer or colander and rinse the extra flavors and sugars in color from those grains with a small amount of hot water. Once you’ve rinsed your grains you won’t need them in your beer anymore but you can use them to compost or they have many baking uses. The next step is to add your malt extract to the water which is then extracted fermentable sugars from malted barley. The small extract is quite concentrated and very thick and syrupy so you’ll want to stir the pot very thoroughly and make sure that you mix everything in very thoroughly.
-
Making the Wort
Once you’ve added your malt extract to the water, it’s commonly referred to as wort which is a Brewer’s word for unfermented beer. It’s important to get all the malt extract out of the jar and into your wort so we usually rinse the jar out with hot water and scrape the insides of the jar to get the rest into your pot once you’ve mixed you extract thoroughly into your wort. The next step is to bring everything to a boil, this can be done on your kitchen stove. When your wort is approaching a boil, it’s important to watch the pot and nurse the boil to a calm comfortable rolling boil carefully without allowing it to surge up and boil over just like a pot of spaghetti. You might want to control the heat or your flame just to make sure that it doesn’t boil over and make a big sticky mess all over your stove or burner. Once you’ve reached a calm comfortable boil, it’s time to start your bittering addition, you’ll want to take your hops out of their bag and place them into your muslin bag. Tie your muslin bags so that none of the molts can escape in your boil and add them to your boiling wort and begin your 60-minute timer to start a 60 minute boil.
As you’re boiling your bittering addition you’ll be extracting the bitterness from those hops to counter the sweetness of the malt. If your recipe may call for a flavoring or an aroma addition of hops, in the last 15 minutes of your boil, you’ll want to add those hops as per the recipe and we have a 15-minute addition to the pot here the 15-minute mark of your 60-minute boil is also the time to add your flocked tablet which will coagulate the proteins that would cause a hazy beer and cause them to fall out after fermentation leading to a beer with better clarity and presentation. So having the hops to the muslin bag and tying it off and steeping them in the pot and also making a warlock.
-
Sanitizing Everything
At this moment, at the end of your 60-minute boil, you’ll want to chill the wort down to a temperature that won’t harm your yeast as quickly as possible. At home, you could submerge your pot in an ice bath in your sink to help cool it down. Allow the boil to sanitize the wort chiller because it’s important that there are no bacteria left in the wort that could cause off-flavors in your beer. Once your boil is finished, it’s important to properly sanitize any equipment that might come in contact with your beer. These sanitizers are readily available at any local homebrew supply store and most of them are no-rinse sanitizers which means you can merely soak or wash any of your equipment for a few moments in the sanitizer allow it to drip dry and you can put it into your water beer with no risk of contamination. A lot of these sanitizers create a foam which is perfectly food-grade and safe and you don’t need to concern yourself with getting all of the foam out of your equipment but you merely need to make sure that everything that will come in contact with your beer has been rinsed appropriately with the sanitizer.
-
Adding Yeast
Remove your hot bags from the wort and add your wort to the fermenter. Top it up to five gallons with cold water. It’s important to use a larger fermenter than the batch size that you’re fermenting because as the work ferments it foams up a lot. Once your wort is topped up to 5 gallons and about room temperature, it’s time to add the yeast. The simplest to use is a packet of freeze-dried ale yeast because it can be torn open and poured directly into the wort to begin fermentation. So you’ll want to sprinkle all of the yeast into your wort and there’s no stirring necessary. The yeast rehydrates themselves and begins to ferment your word on their own after you’ve added the yeast. Attach the airlock with a rubber stopper to your carboy which will allow the gas from fermentation out of the fermenter, that will stop airborne bacteria from getting in. There will be a lot of foam coming up from the co2 being produced and that co2is escaping through the airlock and this process will take a bare minimum of two weeks before you move on to bottling your beer.
-
Bottling
 After you have a fermented batch of beer that’s ready for bottling, in order to siphon this beer into your bottling bucket, we need to raise it up to a level higher than the level that you’re going to be working from. Prepare a corn sugar solution by mixing three or four ounces of corn sugar with one or two cups of water and boil it until the solution is clear again add that solution to the bottom of your bottling bucket and siphon your beer into the bottling bucket on top of the sugar solution to mix it thoroughly in order to siphon this batch of beer. You can use an auto-siphon that is readily available at any homebrew store and after sanitizing the auto-siphon place the end of the tube in your bottling bucket places the siphon into the batch of beer and simply pump the auto-siphon to prime the line and get your siphon started.
So now that we have our batch of beer mixed with a small amount of fermentable sugar in our bottling bucket we’re going to attach our bottle filler to the end of our auto-siphon place the auto-siphon into your batch of beer place one end of the bottle filler into the bottles and start your siphoning when you press the bottle filler down into the bottom of the bottle. It’ll fill from the bottom without splashing because at this point once you have fermented beer, introducing oxygen and splashing it into your beer will stale beer and decrease the shelf-life so we want to siphon it carefully into our bottles without splashing when your bottle is full right to the brim. We’re almost there pull the bottle filler out of the bottle and that’ll stop the flow you place in your sanitizer if you’d like take a sanitized cap.
-
Enjoying the Beer
 You’ll need to allow a week or two for the small amount of sugar that we added back to the batch of beer to ferment inside the bottles and create carbonation, none of these processes are entirely hard. In fact, we find the process to be fun and simple and the most important part is after time you can be creative with your recipes and you’ll absolutely love the beer that you’re making eventually you’ll find that you can make beer exactly like you’d like it to taste beer that fits your own personal tastes beer that impresses your friends and a beer like nothing you’ve ever tasted before.


